Git and GitHub Commands
Git and GitHub are powerful tools that help you save your code, track changes, and share your projects online.
This guide will help you understand and use the most common commands — step by step and in simple words.
🧠 What is Git and GitHub?
- Git → A software that helps you track changes in your code on your computer.
- GitHub → A website where you can store your Git projects online and share them with others.
🪜 Step 1: Open Your Project Folder
Go to the folder where your project is saved.
Right-click inside the folder and choose "Open Git Bash here"
(or open the terminal in VS Code if you use it).
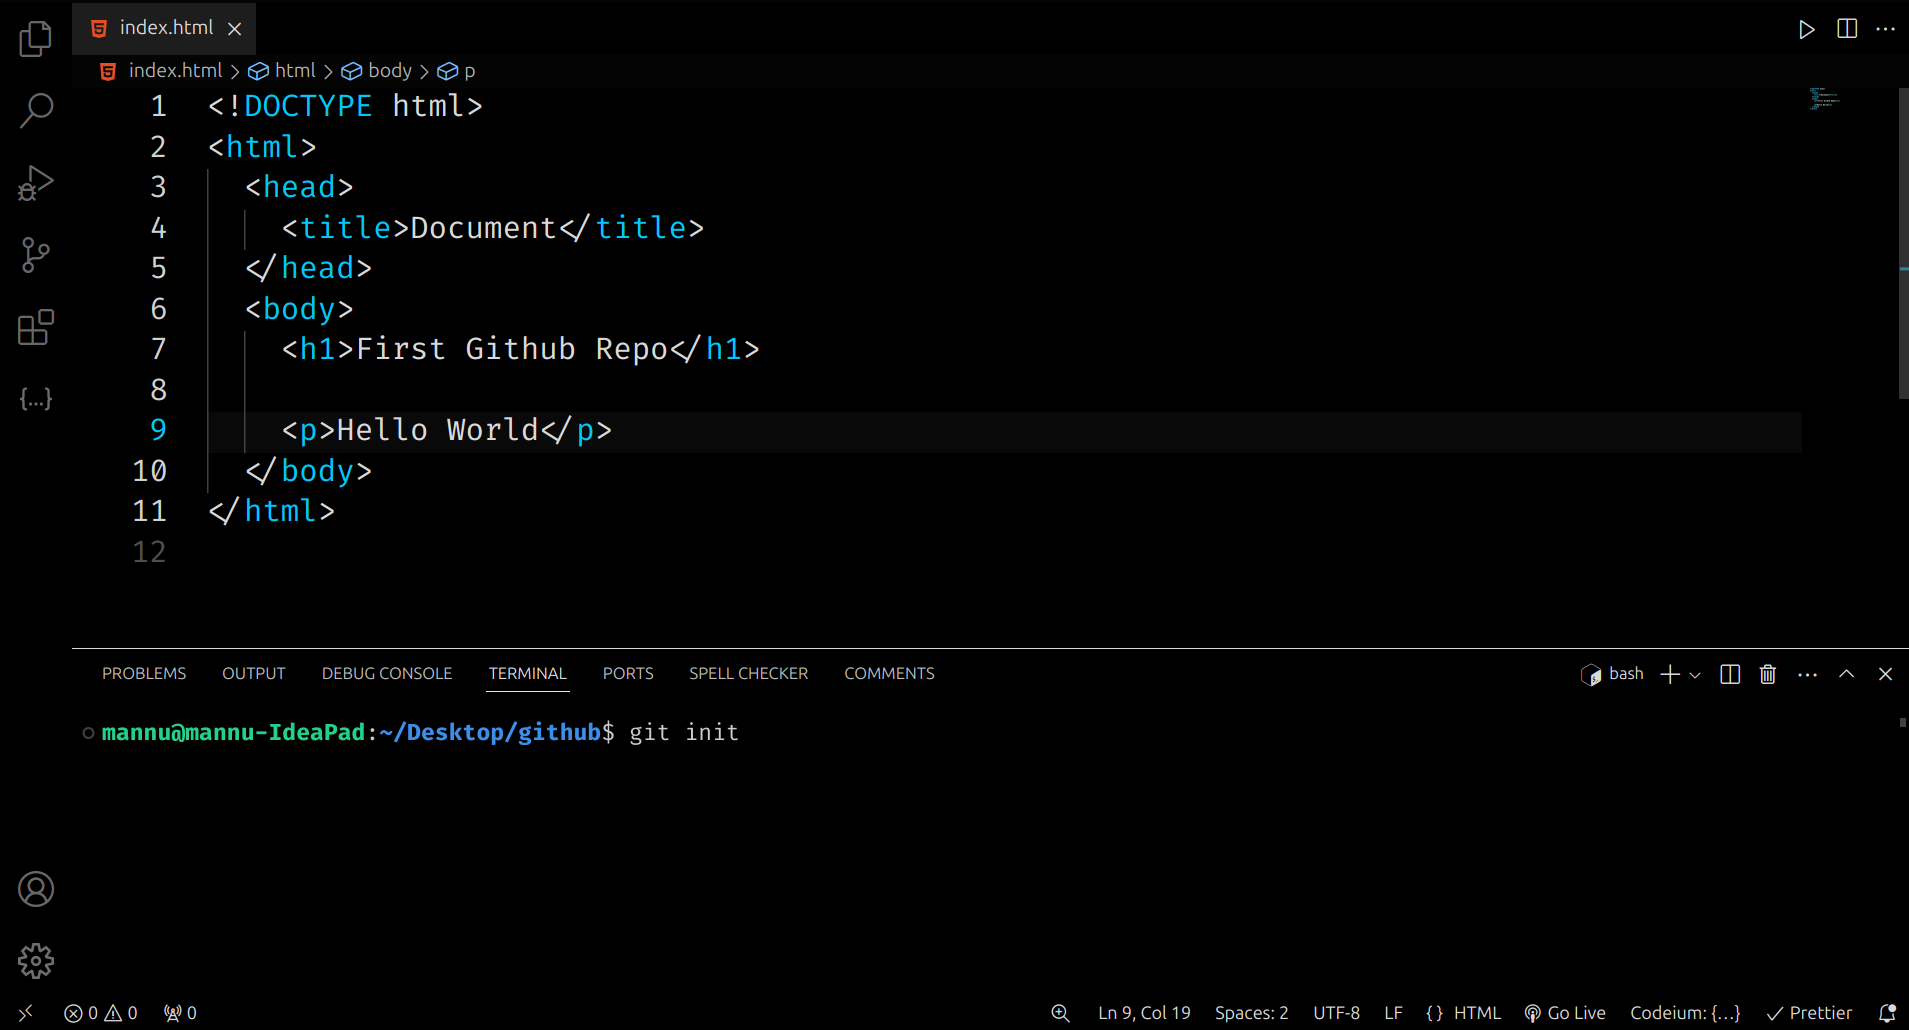
🪜 Step 2: Initialize Git (Start Tracking Your Project)
This command tells Git to start watching your folder for changes.
git init
📝 Note: You only need to run this command once per project.
After this, Git will create a hidden .git folder — that means Git is now working in your project.
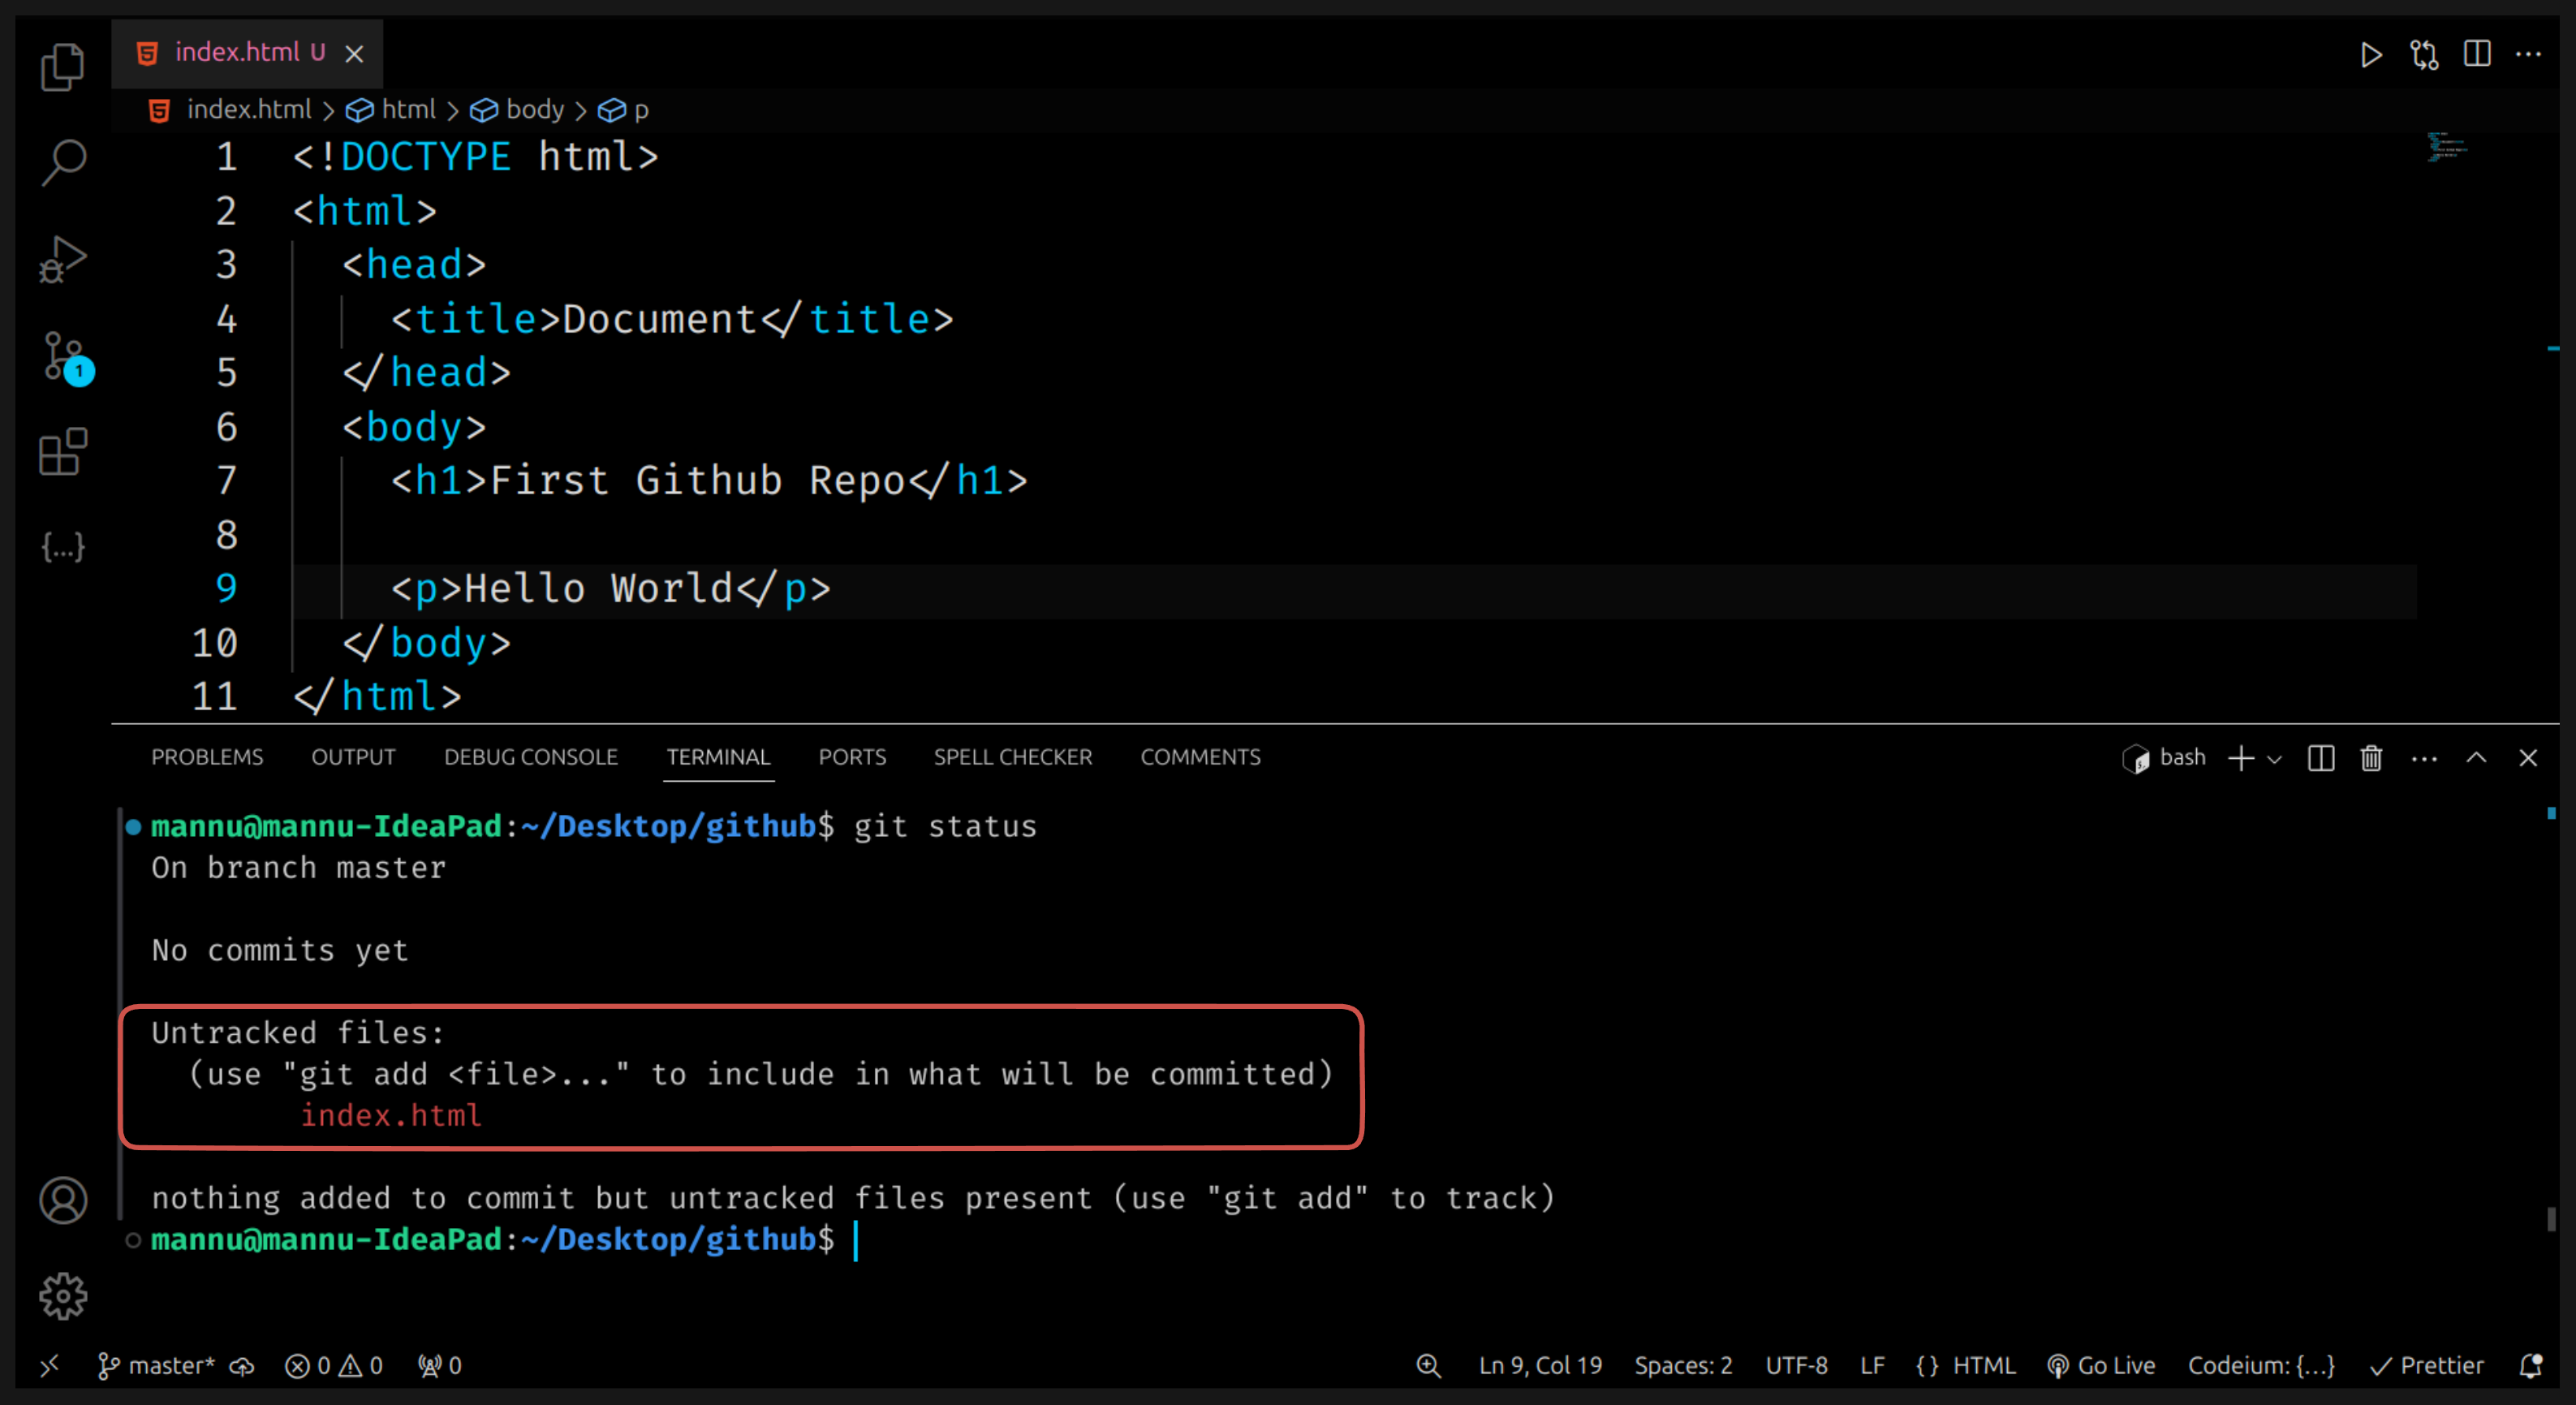
🪜 Step 3: Check the Status of Your Files
See which files are new, changed, or ready to be uploaded.
git status
- Red text → new or changed files (not added yet)
- Green text → files ready to be saved (staged)
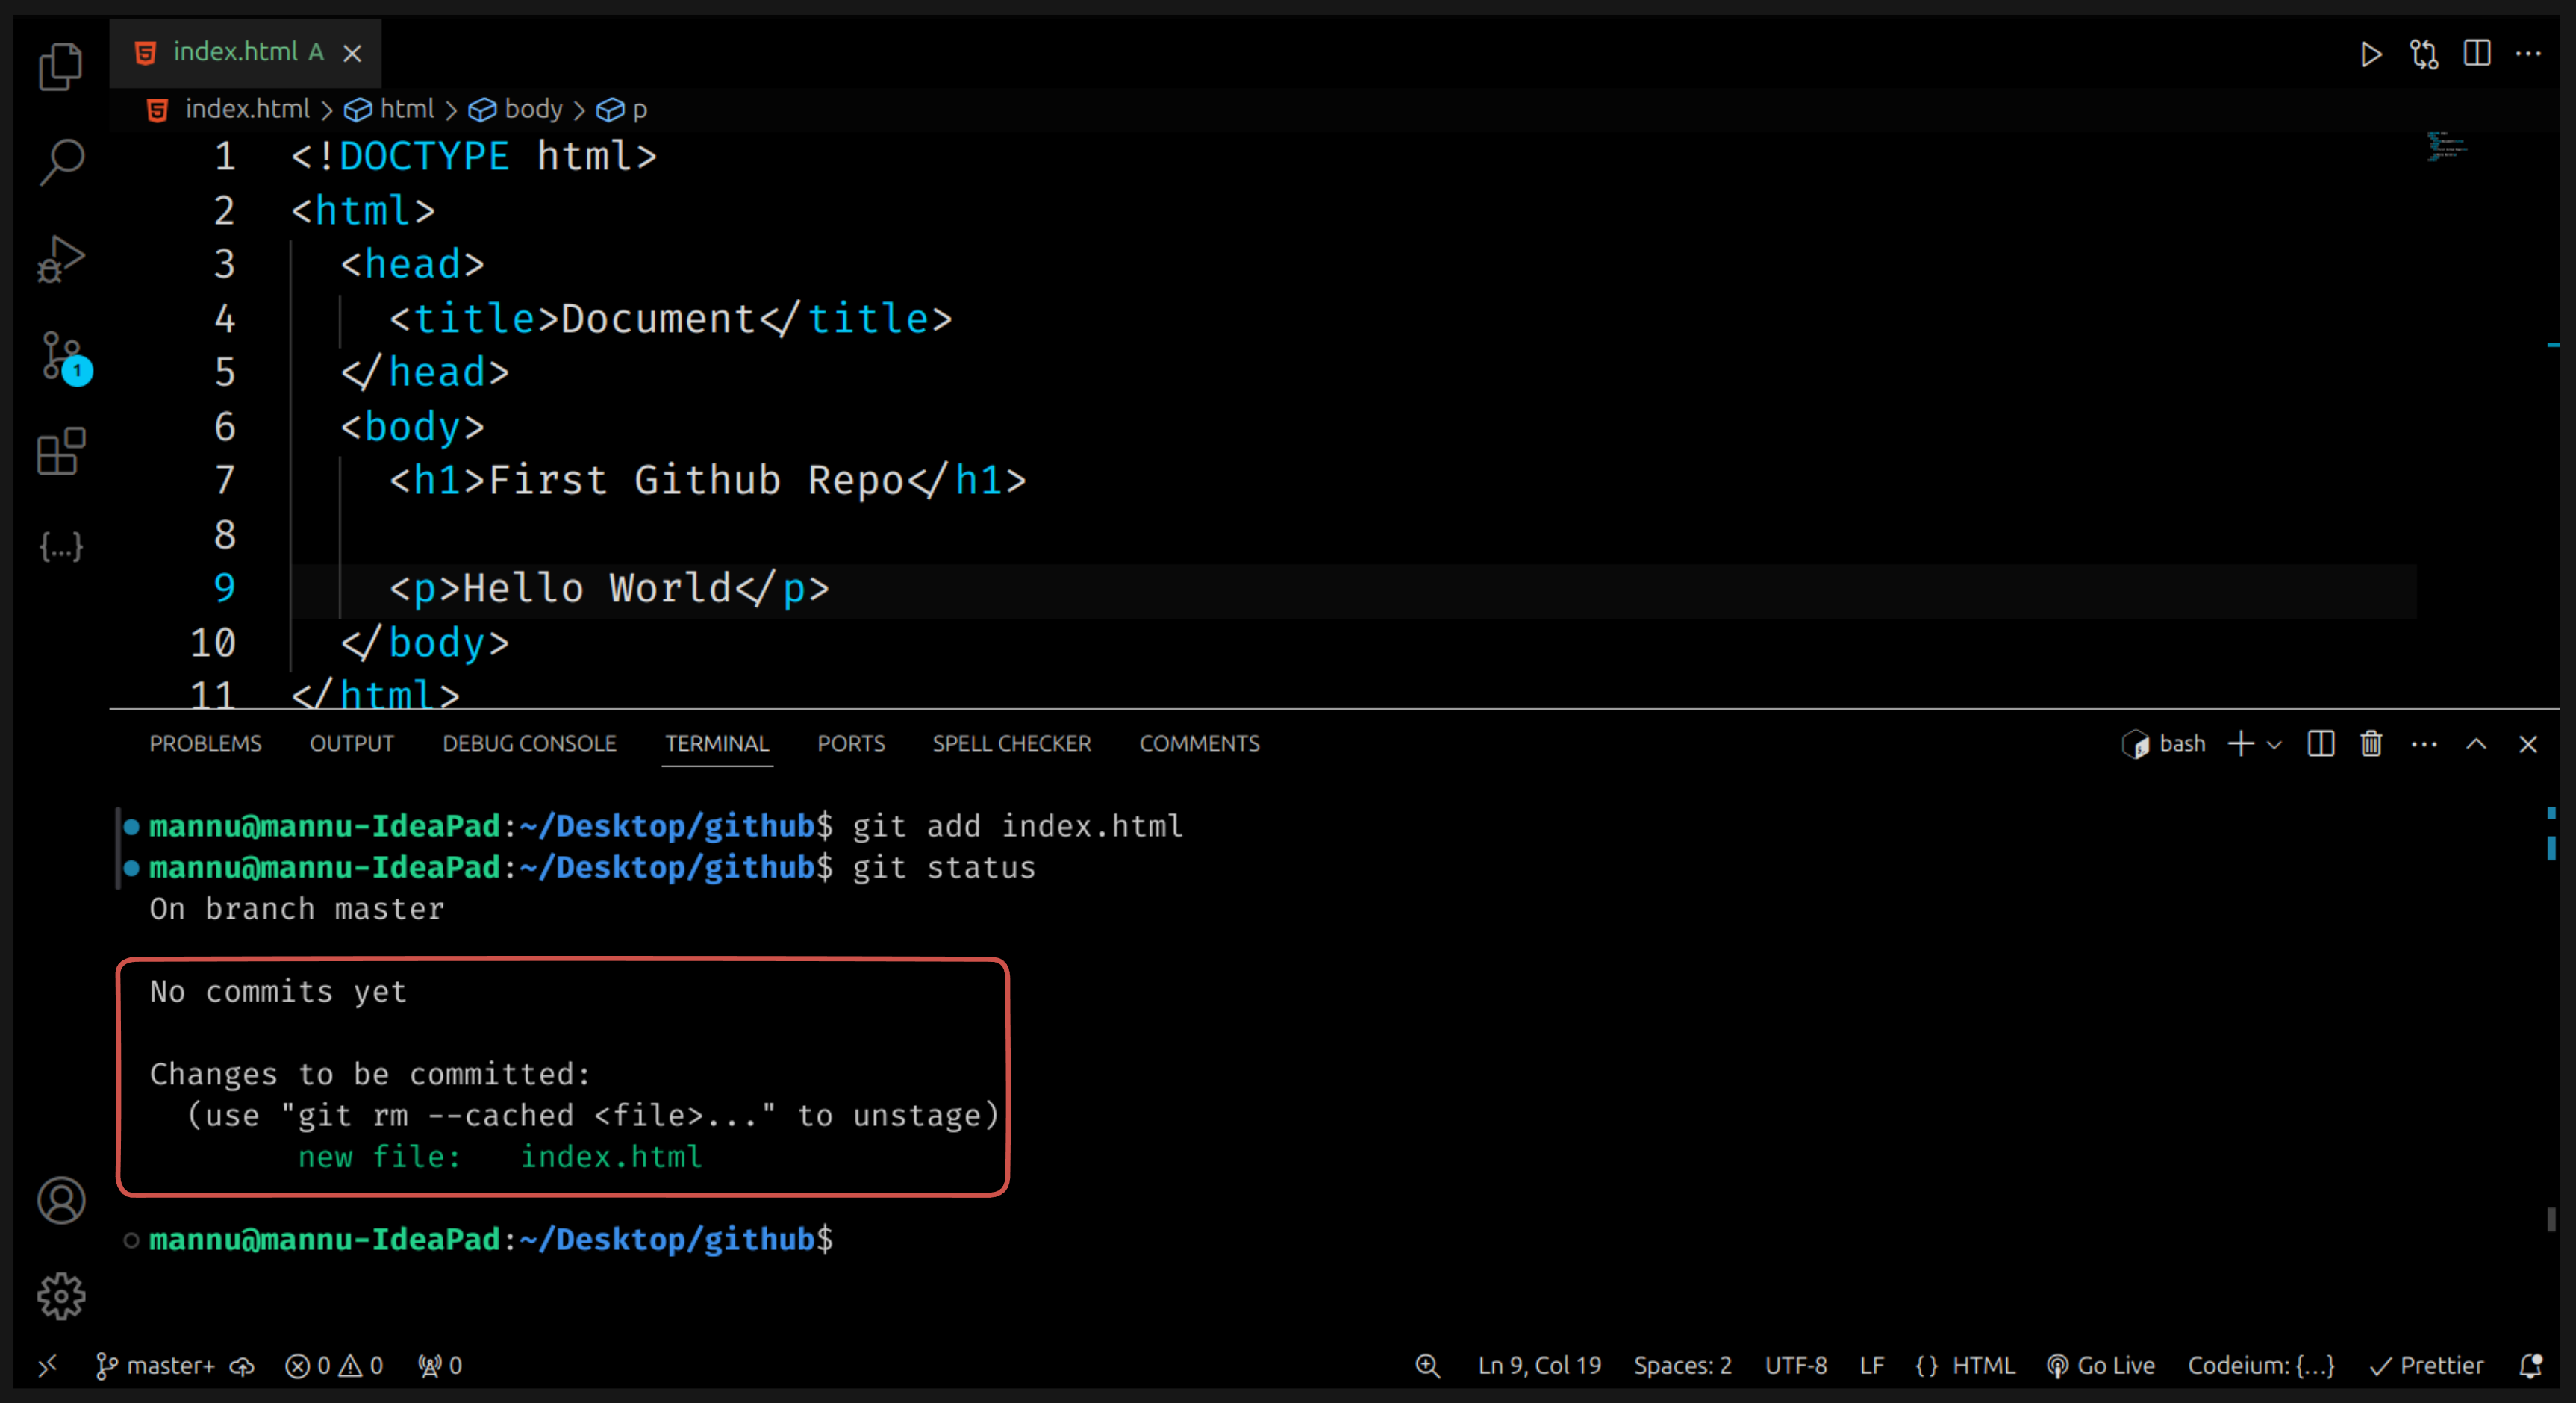
🪜 Step 4: Add Files to Git
Before saving, you must tell Git which files you want to include.
git add .
✅ The . means add all files.
You can also add just one file like this:
git add index.html
Now, if you run git status again — the files should turn green.
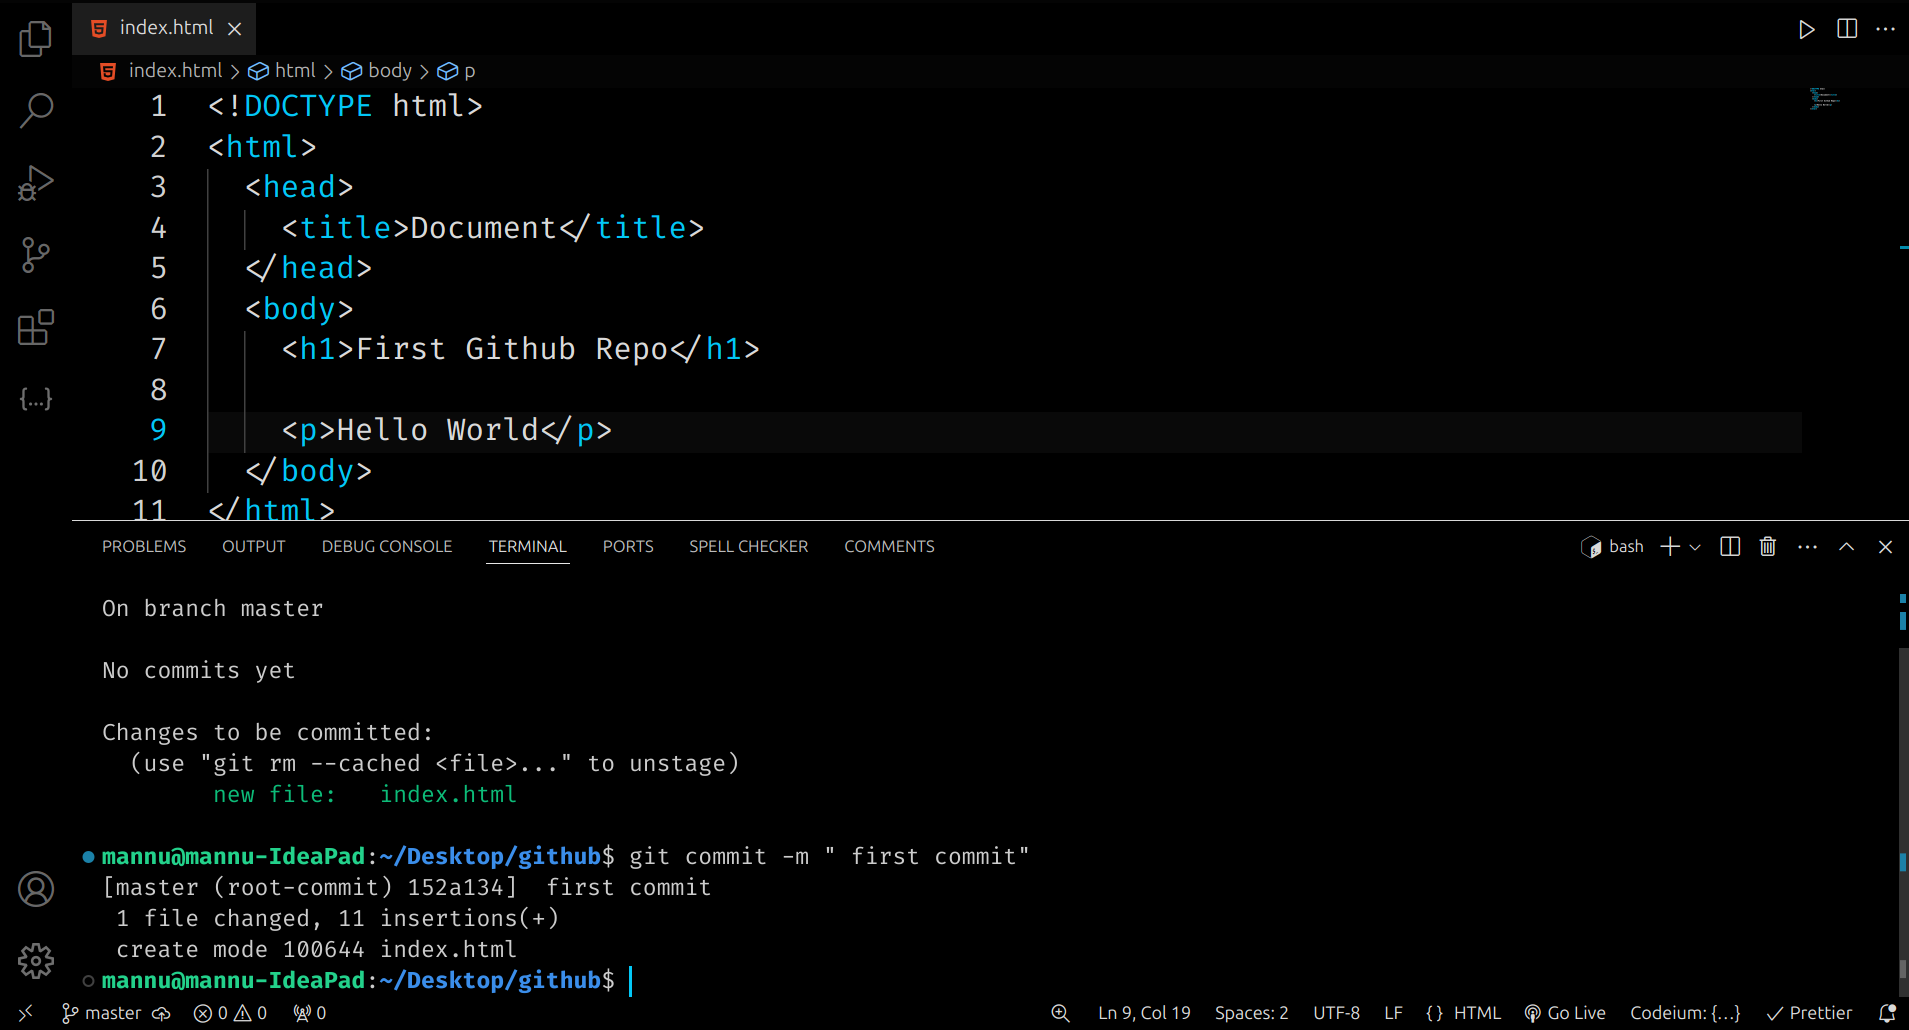
🪜 Step 5: Save Your Work (Commit)
When your files are ready, you can commit them. A commit means saving a snapshot of your project with a small message.
git commit -m "First commit"
💡 Always write a short message in quotes explaining what you changed.
🪜 Step 6: Push Your Code to GitHub
Now it’s time to upload your local project to GitHub so it appears on your GitHub account.
We use the git push command for that.
🔹 What does git push do?
The git push command sends (or uploads) your saved code changes from your computer to your GitHub repository (online).
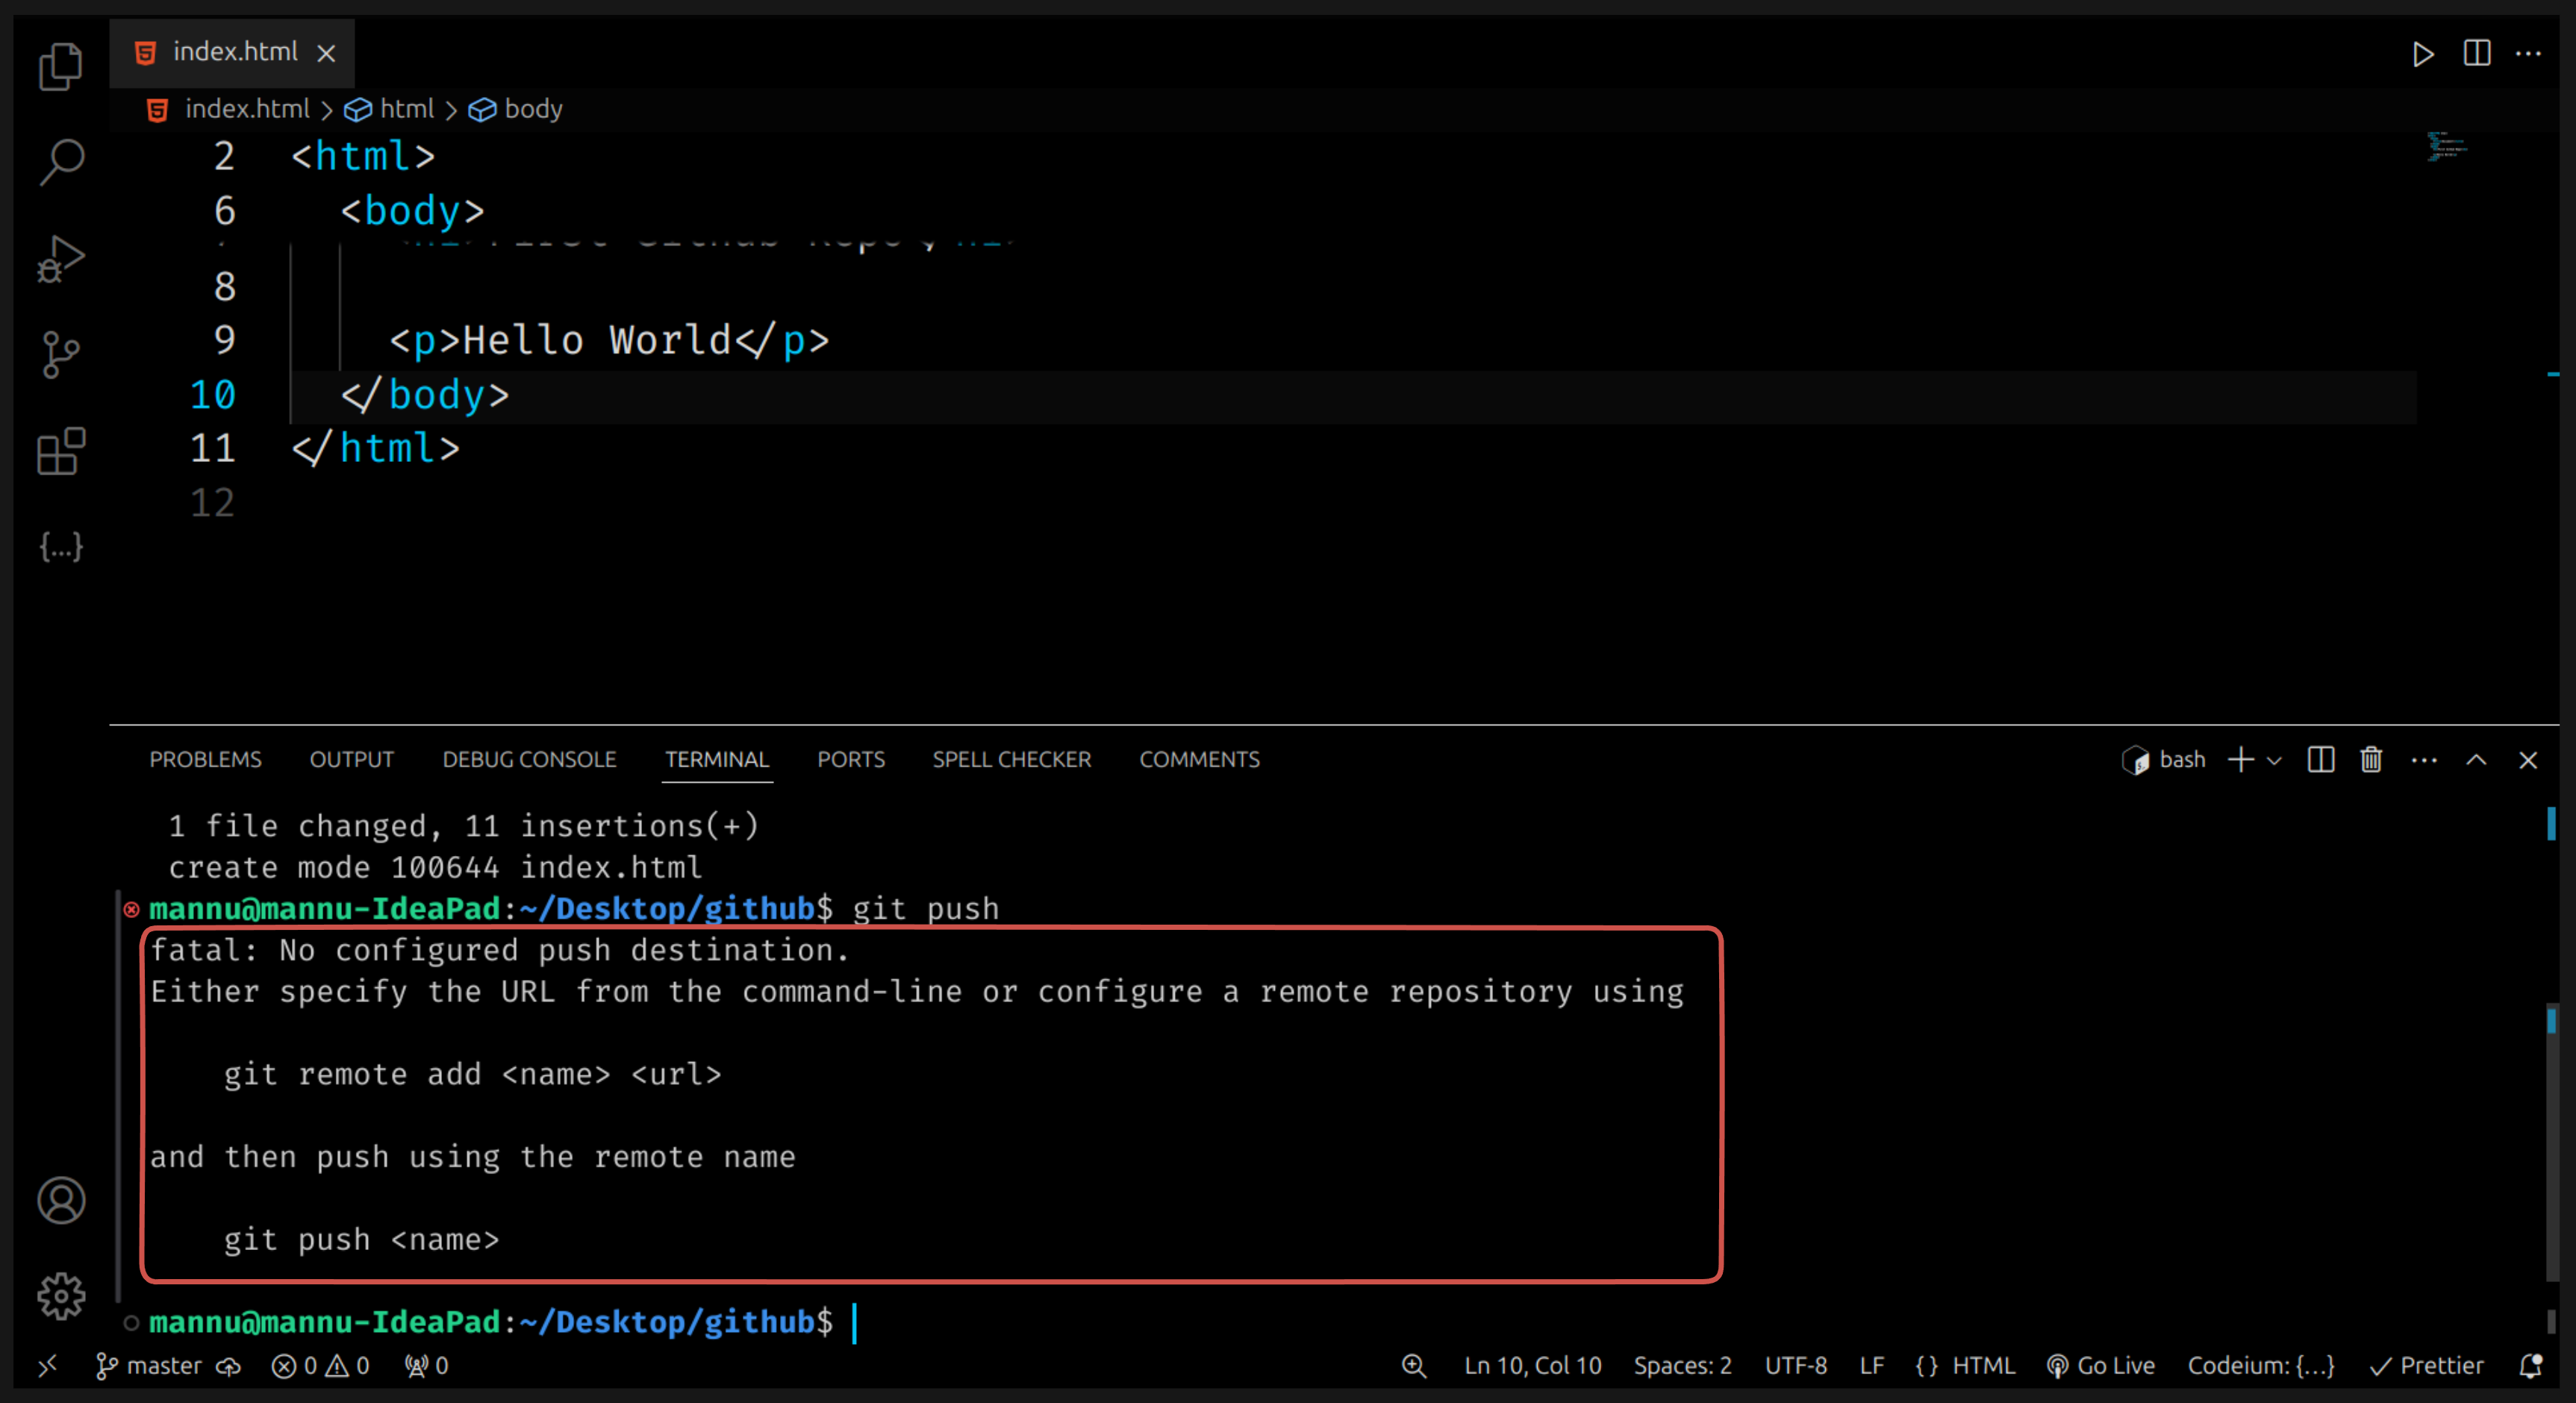
⚠️ Before using
git push, make sure you have already connected your local folder to your GitHub repository using
git remote add origin "your-repository-link".If you skip this step, Git will show a warning and your code won’t be uploaded.
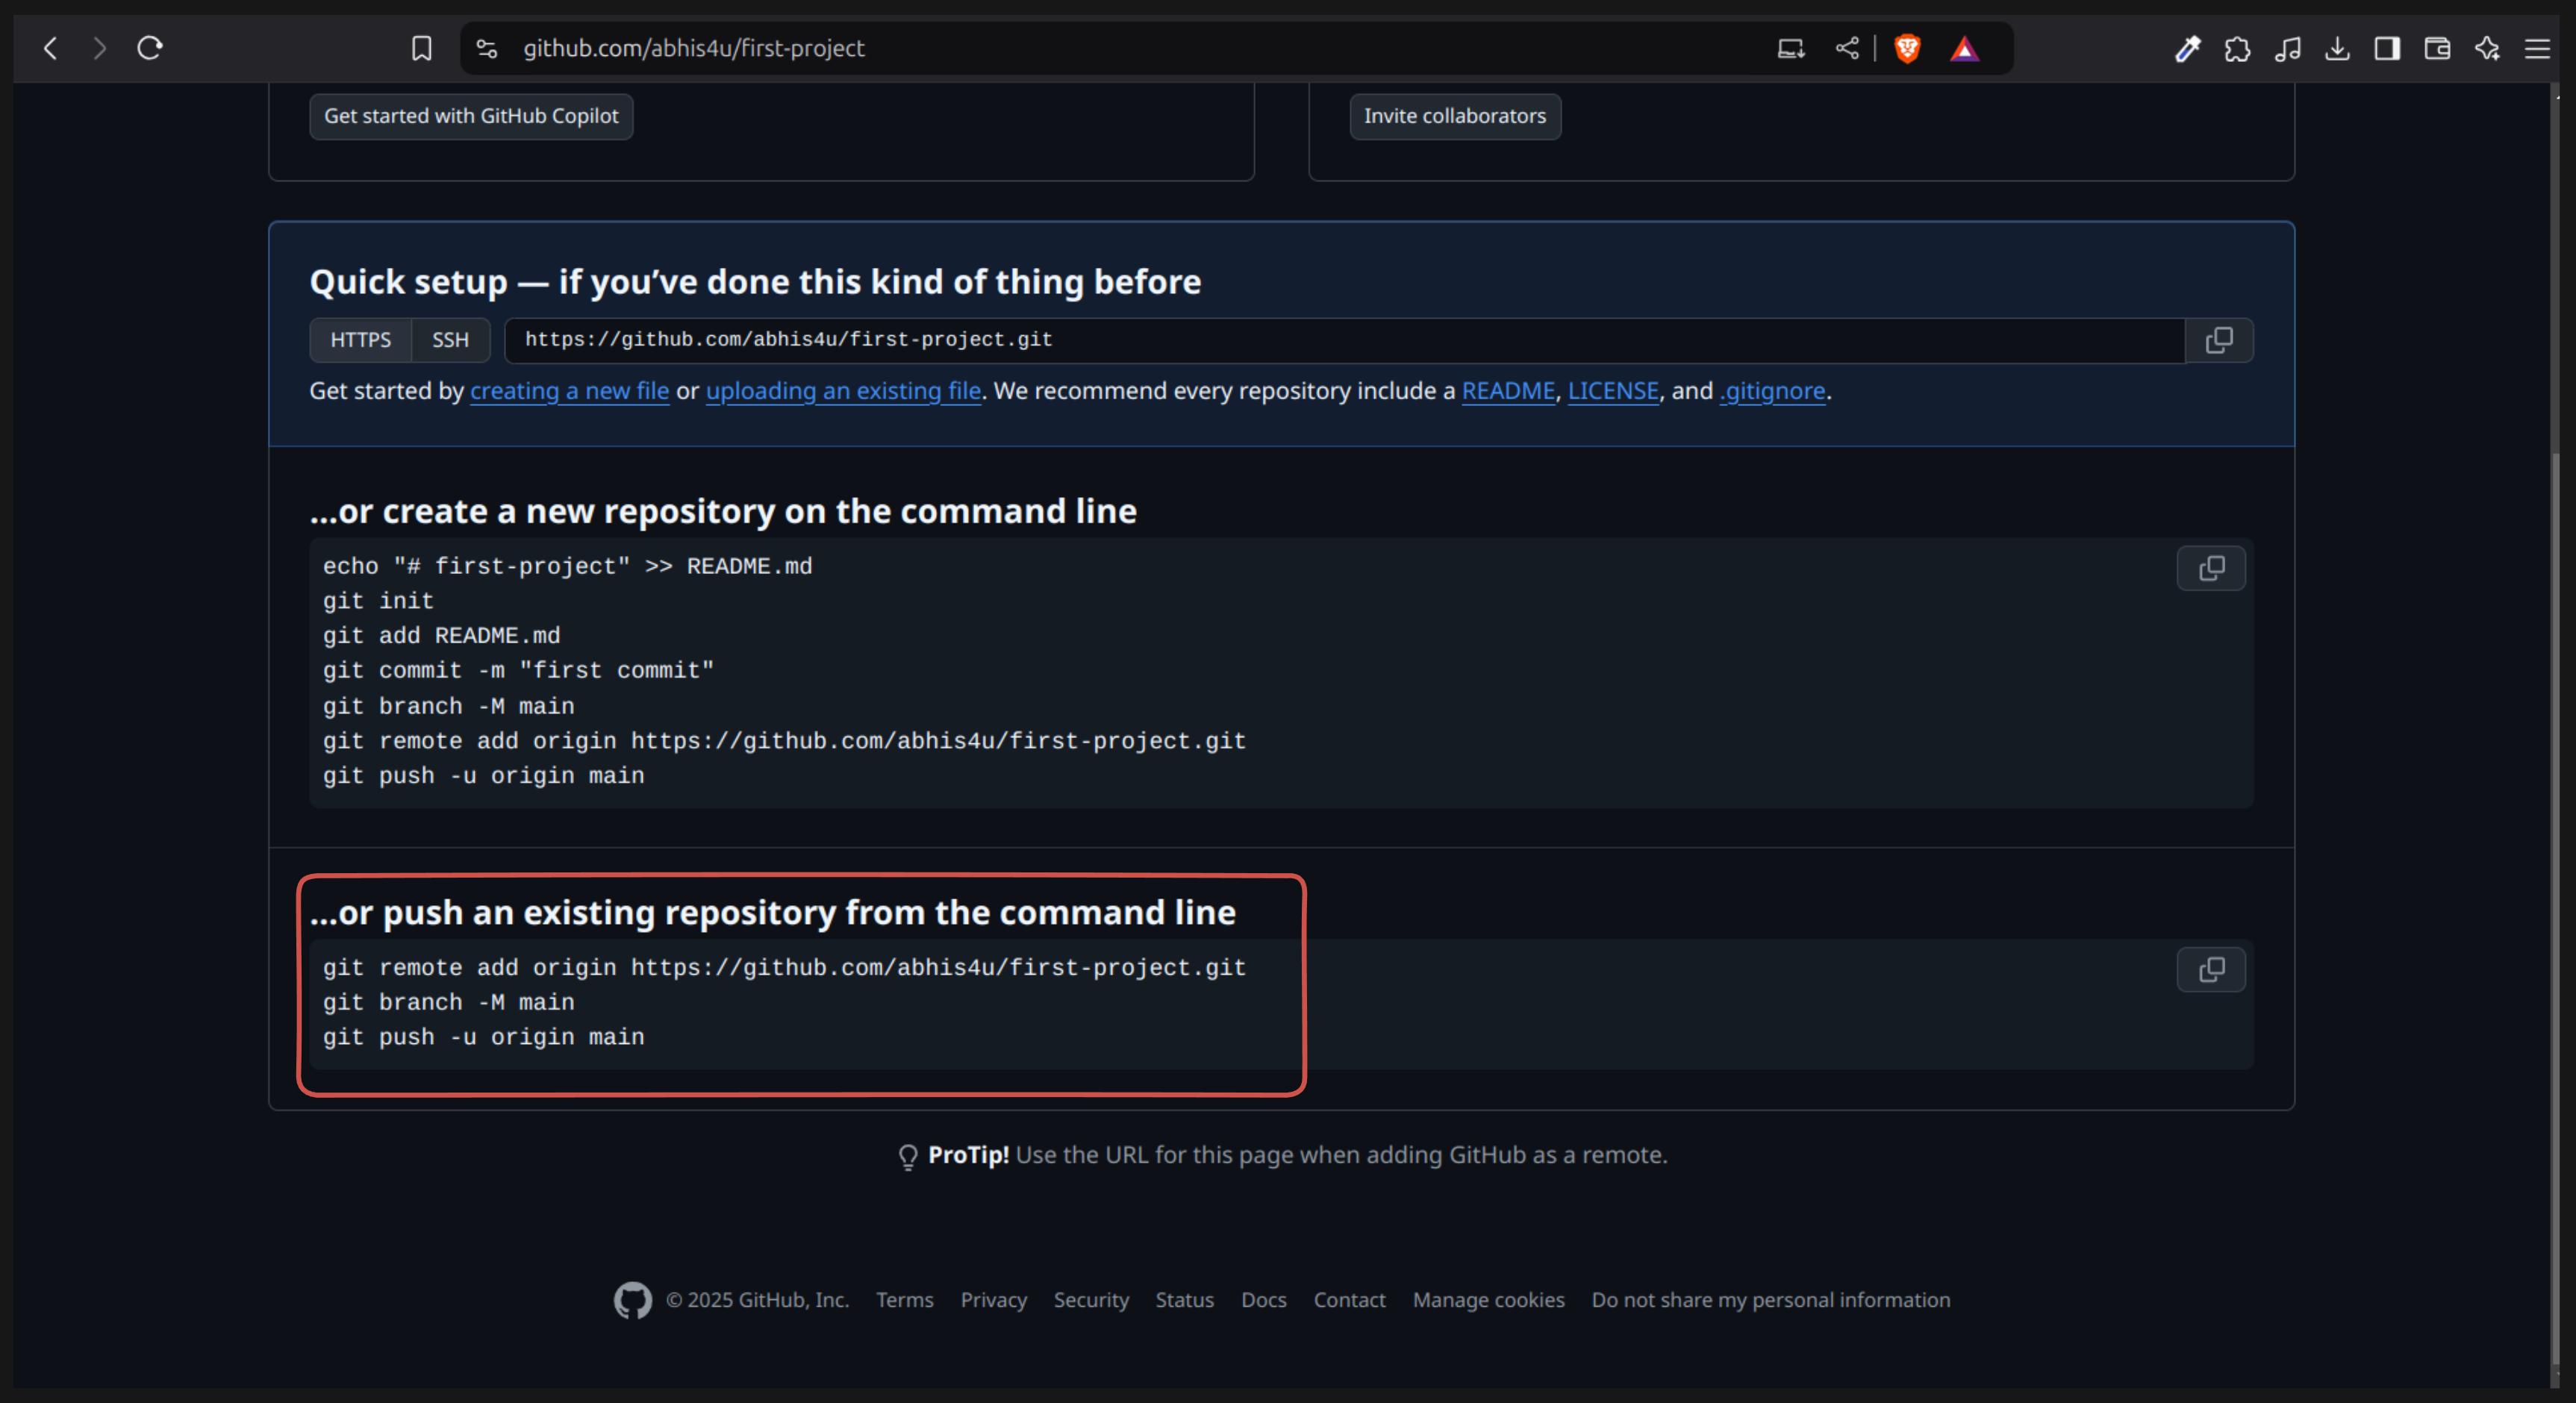
🪜 Step 6.1: Go Back to Your GitHub Repository
After creating your repository on GitHub, you’ll see two sections on the page:
- “…or create a new repository on the command line.”
- “…or push an existing repository from the command line.”
👉 Choose the second option (push an existing repository) and copy the commands shown there.
🪜 Step 6.2: Run These Commands One by One
1️⃣ Connect your local folder to GitHub
git remote add origin "your-repository-link"
This command connects your project folder on your computer to your GitHub repository.
(Replace "your-repository-link" with the actual link of your repo.)
2️⃣ Rename your main branch (optional but recommended)
git branch -M main
Git used to call the main branch master, but now GitHub and most tools use main instead. This command renames it to keep everything consistent.
3️⃣ Upload your project to GitHub
git push -u origin main
This command actually uploads all your commits (saved changes) to your GitHub repository. Once this runs successfully, your project will appear online 🎉
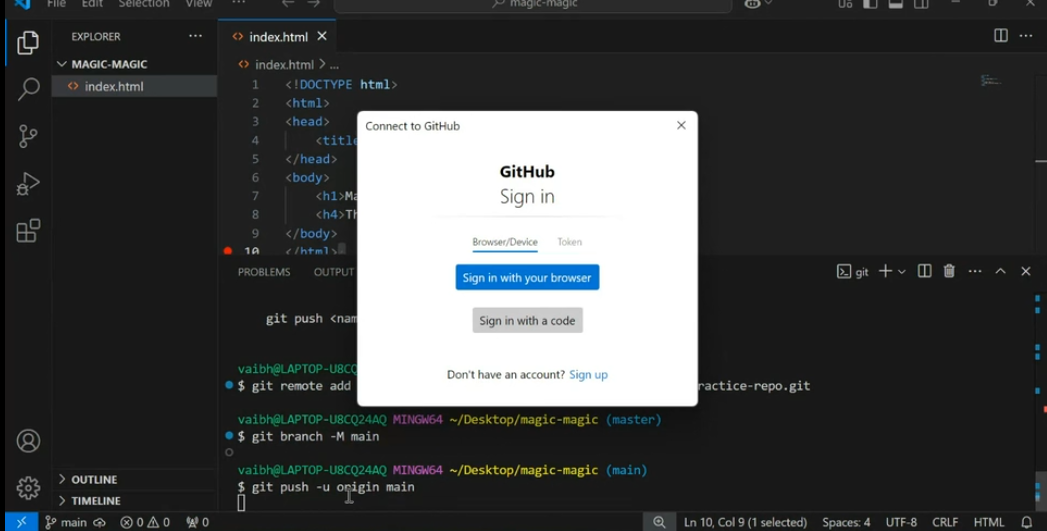
🟡 Are you doing all these steps for the first time?
If yes, don’t worry! 😊
You might see a pop-up window asking you to sign in to your GitHub account.
Simply click on “Sign in with your browser” to continue.
- Click Sign in with your browser
- Then click Authorize Git Credential Manager in your browser.
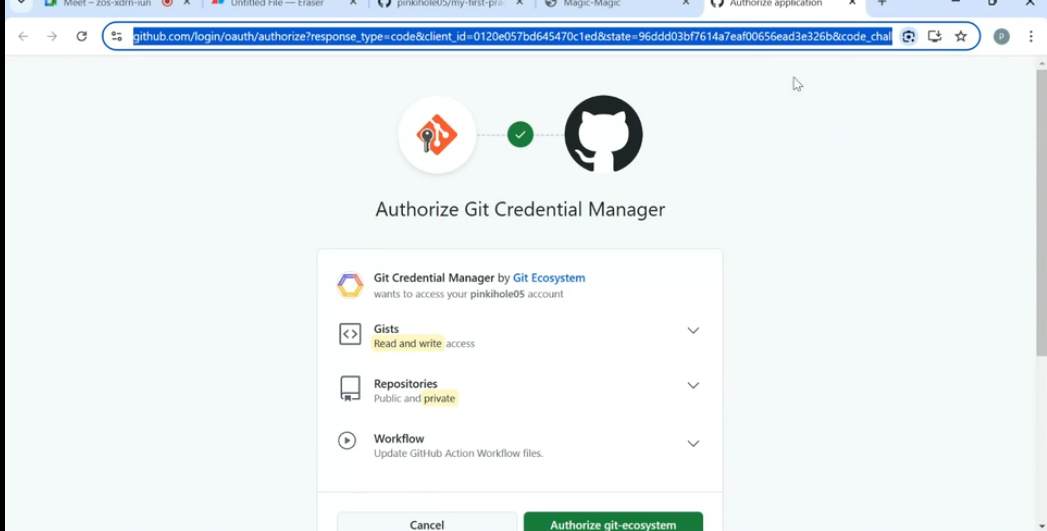
✅ After signing in, your code will be uploaded to GitHub!
🎯 Common Git Commands
| Command | What It Does |
|---|---|
git init | Start a new Git repository (only once) |
git status | Check which files are changed or new |
git add . | Add all files to be saved |
git commit -m "message" | Save your changes with a message |
git remote add origin <url> | Connect your local project to GitHub |
git branch -M main | Rename main branch |
git push -u origin main | Upload code to GitHub |
git pull | Get latest updates from GitHub |
git log | Show all commits done so far |
🎉 Congratulations!
You’ve learned the basic Git and GitHub commands! Now you can easily upload your projects online and keep track of your work.
Whenever you make changes, just repeat these three commands:
git add .
git commit -m "Updated project"
git push