How to create react app
Create React app
- Create a folder and named it (whatever name do you want to keep) First_Flight
- Open it in VS Code editor.
- Create a file with name of
package.json( A "package" refers to a library, and it contains all the information about the library we're using.), It is the backbone of react project.
package.jsonfiles contain name of your react project, version, entry-point, script, dependencies(package, library, dependency),browserslist
In package.json file we create an object "{}" as we know that in json file we feed the data in key-value pair we wright everything in double quote e.g. ("name":"first_flight")
first right the name of that project
first_flight
{
       "name":"first_flight",
}
- In the second line we write the version of that project
1.0.0
"version":"1.0.0",
- On the third line, we add a
descriptionfield to provide a brief summary of the project:
"description":"this is my first ReactAPP"
- Next, we add a
mainfield, which specifies theentry pointof the application. In theroot directory, we create a folder namedsrcto organize our source files. Inside thesrc folder, we create a file calledindex.js.
"main":"index.js"
Next, we add a
scripts object. Inside it, we define ascriptcalledstartand assign it the commandreact-scripts startto run the application:After that we write the dependencies it refer to external packages or libraries that your React project relies on to function properly. These packages are necessary for your React application to run as expected.
"dependencies":{

}
Then, we create a
public folder, and inside it, we add a file namedindex.html. This will be theonly HTMLfile in our entire React project, which is why React is referred to as aSingle Page Application (SPA) framework.Next, we write the basic HTML structure. Inside the
<body>tag, we add a<div>with the idroot.
<!DOCTYPE html>
<html lang="en">
  <head>
    <meta charset="UTF-8" />
    <meta name="viewport" content="width=device-width, initial-scale=1.0" />
    <title>First Flight</title>
  </head>
  <body>
    <div id="root"></div>
  </body>
</html>
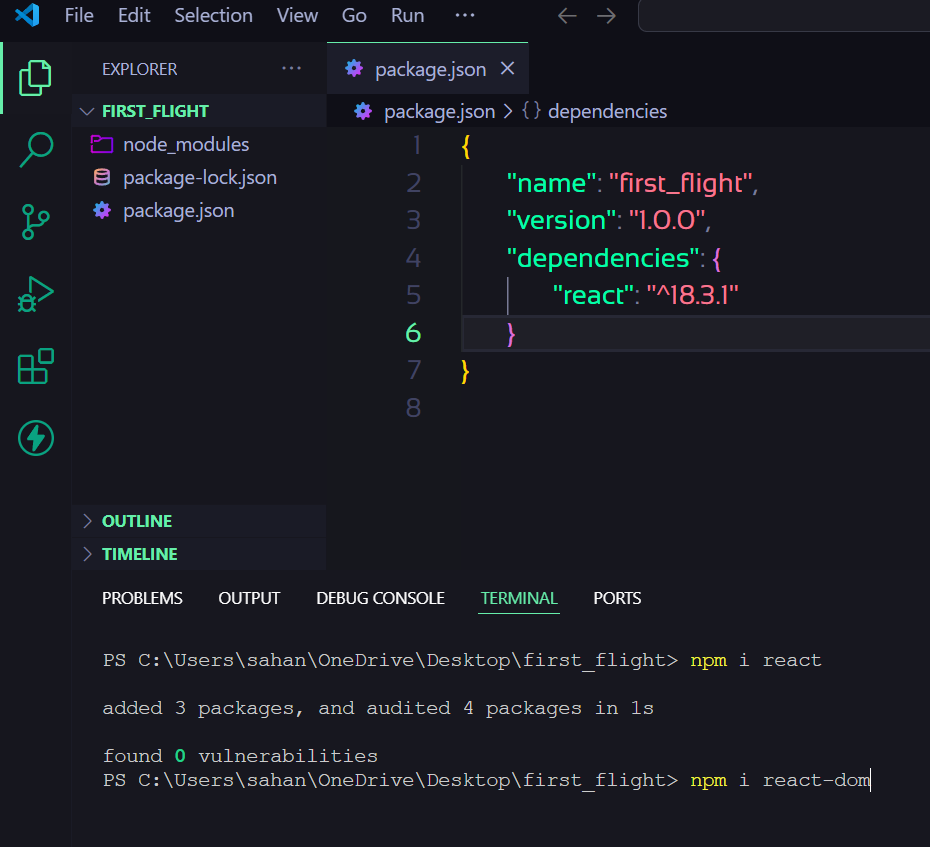
- Next we write the command in the terminal
npm i reactit will give all thedependenciesof the react and you see another file with the name ofpackage-lock.jsonandnode_modules

Open the
package.jsonfile, and you will see a new key-value pair under thedependencies object. This pair includesreactas the key and its version^19.0.0as the value on the right side.In the
package-lock.jsonfile, you can see the flow ofdependencies, showing which librarydependson which otherlibraries.Next we write another command npm i react-dom this is the dependencies which make virtual dom in react

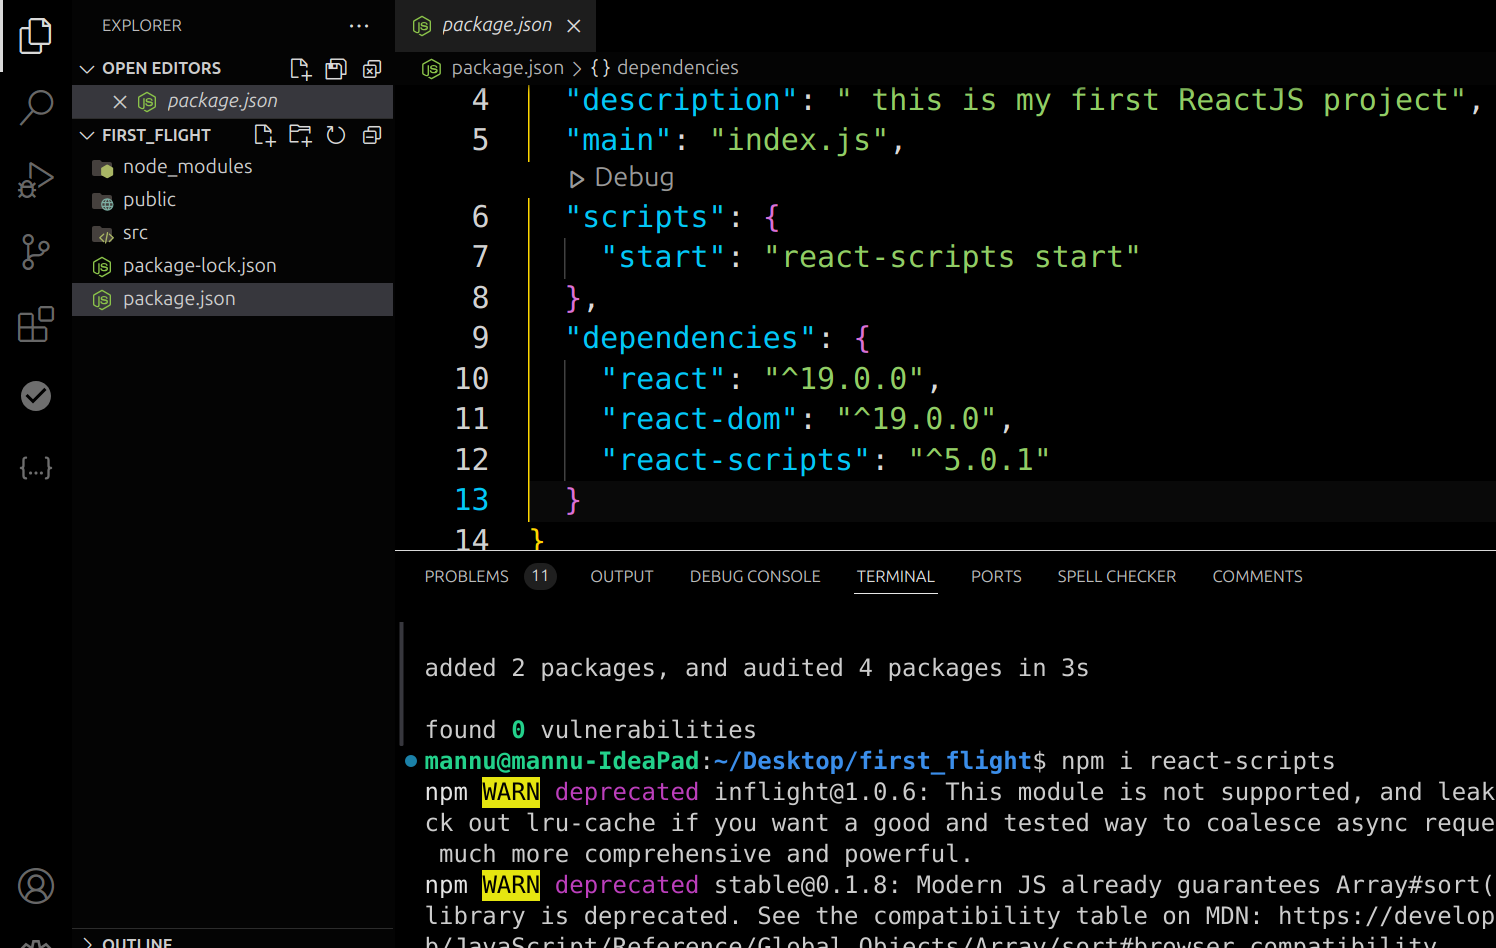
- Next, open the terminal and
install react-scriptsby running the command:
npm install react-scripts
This may take some time as react-scripts is larger than the other two dependencies.

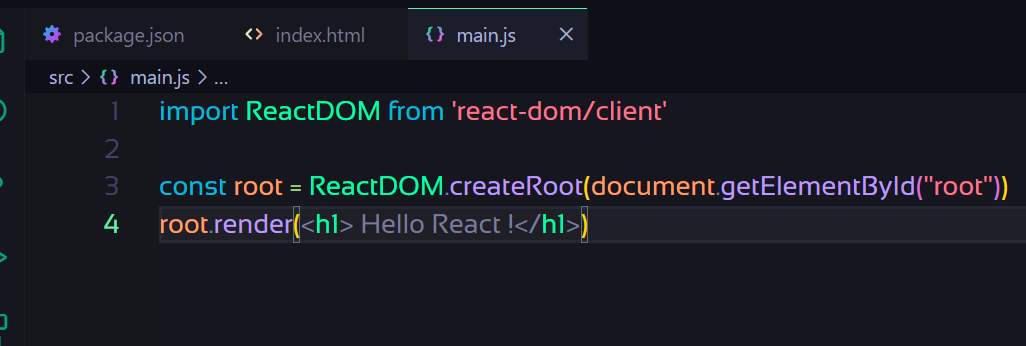
- In index.js, we import ReactDOM from "react-dom/client" using the following line:
import ReactDOM from "react-dom/client";
This is used to create the root of our React application.
- Then we create a root element

- Next in terminal write
npm startafter that it will ask "Would you like to add the defaults to your package.json" sayyafter that it will redirect to you on the browser and you see the output, with that it install the some of configuration for browserslist, which is a tool used to specify which browsers your project should support. In simpler terms, it tells browserslist which browser versions your project needs to work with in both production and development environments.
package.json
{
  "name": "first_flight",
  "version": "1.0.0",
  "description": " this is my first ReactJS project",
  "main": "index.js",
  "scripts": {
    "start": "react-scripts start"
  },
  "dependencies": {
    "react": "^19.0.0",
    "react-dom": "^19.0.0",
    "react-scripts": "^5.0.1"
  },
  "browserslist": {
    "production": [
      ">0.2%",
      "not dead",
      "not op_mini all"
    ],
    "development": [
      "last 1 chrome version",
      "last 1 firefox version",
      "last 1 safari version"
    ]
  }
}
