Form Handling
Form handling in React.js refers to the process of managing and processing HTML forms within a React application. HTML forms are commonly used to collect and submit user input, such as text, checkboxes, radio buttons, and more. React provides a way to handle forms by creating controlled components, which means that the form elements are controlled by the state of your React components.
Here are the steps and concepts involved in form handling in React:
Create a Home Component: You can create a React component that represents the form. This component will contain the form elements and handle user interactions.
Controlled Components: In React, form elements like
<input>and<select>are turned into controlled components by binding their values to the component's state. This means that you set the value of the input elements based on the state and handle changes to the input elements through event handlers.State Management: Define state variables to store the data entered by the user in the form elements. When a user interacts with the form (e.g., typing in an input field), update the state accordingly.
Event Handlers: Use event handlers like
onChangefor input fields andonClickfor buttons to capture user actions. When an input field value changes, update the corresponding state variable.
input field
In React, a controlled component is one where form elements are connected to React state. Changes in form element values are immediately reflected in the state. This is achieved by using the 'value' prop to set initial values and the 'onChange' event to handle updates, which involves updating the state with the new value.
Here's an example:
import React, {useState} from "react";

function Home() {

const [fullName, setFullName] = useState('')
  return (
    <>
    <div>
    <form>
    {fullName}
    <input type="text"
     placeholder="Full Name"
     onChange={(e)=>{
        setFullName(e.target.value)
     }} />
    </form>
    </div>
    </>
  );
}

export default Home;
output:

The useState hook in React defines a state variable (fullName) and a state update function (setFullName). It connects the initial value of an input element using the 'value' prop to setFullName. The 'onChange' event, updates inputValue with new input values, which are instantly displayed on the screen.
radio button
Handling radio buttons in a form in React involves setting up the form, creating radio input elements, managing their state, and handling user interactions.
import React, {useState} from "react";

function Home() {
 // handling ratio buttons
const [gender, setGender] = useState('male')
  return (
    <>
    <div>
    <form>
    <h2>Selected Gender: {gender}</h2>
    <input
     type="radio"
     name="gender"
     value="male"
     onChange={(e)=>{
        if(e.target.checked){
            setGender(e.target.value)
        }
     }}
     checked={gender==="male"}
    />Male

    <br />

    <input
     type="radio"
     name="gender"
     value="female"
      onChange={(e)=>{
        if(e.target.checked){
            setGender(e.target.value)
        }
     }}
     checked={gender==="female"}
    />Female
    </form>
    </div>
    </>
  );
}

export default Home;
output:

How to handle checkboxes and dropdowns in Controlled Components
check box
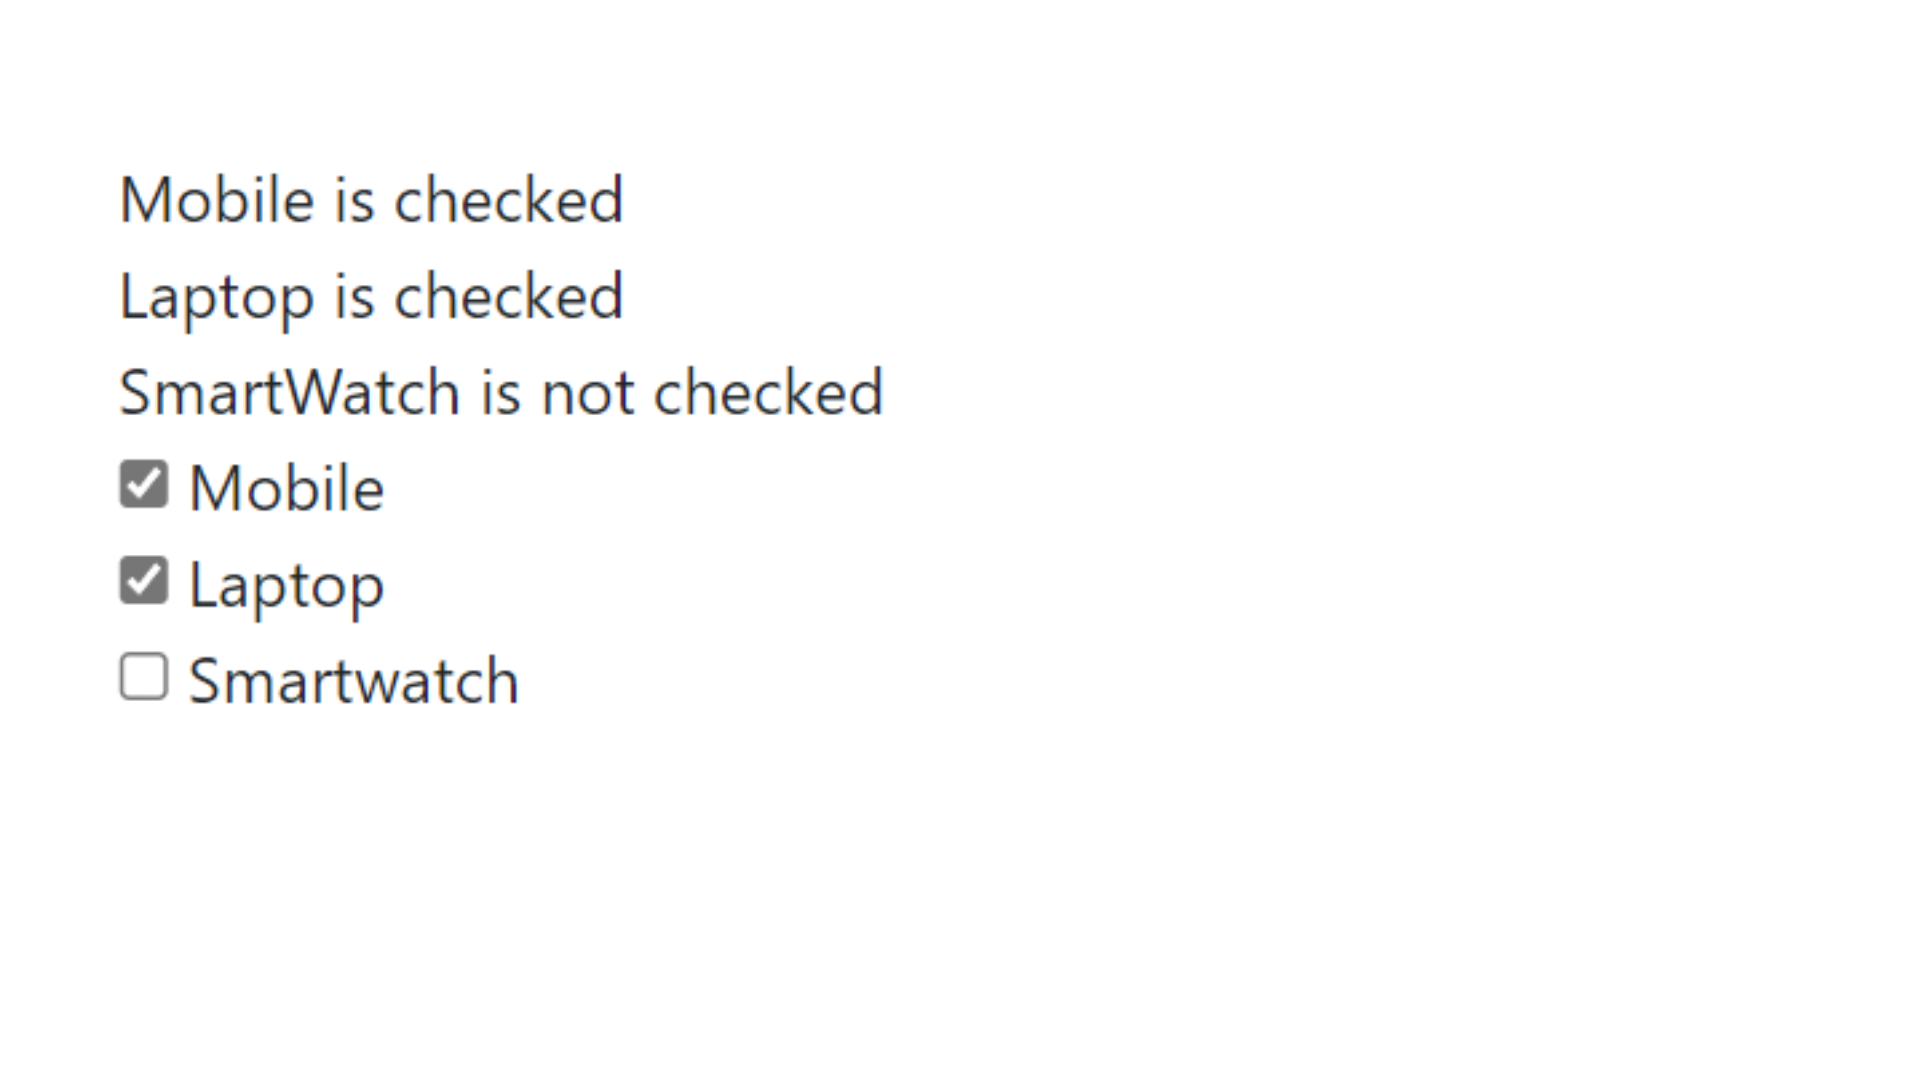
You can work with checkboxes in React by controlling them using the checked prop of the checkbox input element. This prop should be set based on the component's state. When a user clicks a checkbox, it triggers a change event, and you can update the state of your component accordingly to reflect the new checkbox status. This way, you can keep track of which checkboxes are selected or unselected in your application.
Example 1:
import React, {useState} from "react";

function Home() {
 // handling check boxes
const [mobile, setMobile] = useState(false);
const [laptop, setLaptop] = useState(false);
const [smartwatch, setSmartWatch] = useState(false);
  return (
    <>
    <div>
    <form>
    {mobile ? 'Mobile is checked' : 'Mobile is not checked'}

    {laptop ? 'Laptop is checked' : 'Laptop is not checked'}

    {smartwatch ? 'Mobile is checked' : 'Mobile is not checked'}
    <input
    type="checkbox"
    value="mobile"
    checked={mobile}
    onChange={(e)=>{
        setMobile(e.target.checked);
    }}
     /> Mobile <br/>

    <input
    type="checkbox"
    value="laptop"
    checked={laptop}
    onChange={(e)=>{
        setLaptop(e.target.checked);
    }}
     /> Laptop <br/>

    <input
    type="checkbox"
    value="smartwatch"
    checked={smartwatch}
    onChange={(e)=>{
        setSmartWatch(e.target.checked);
    }}
    /> Smartwatch <br/>

    </form>
    </div>
    </>
  );
}

export default Home;
output:

Example 2:
import React, {useState, useEffect} from "react";

function Home() {
 // handling check boxes
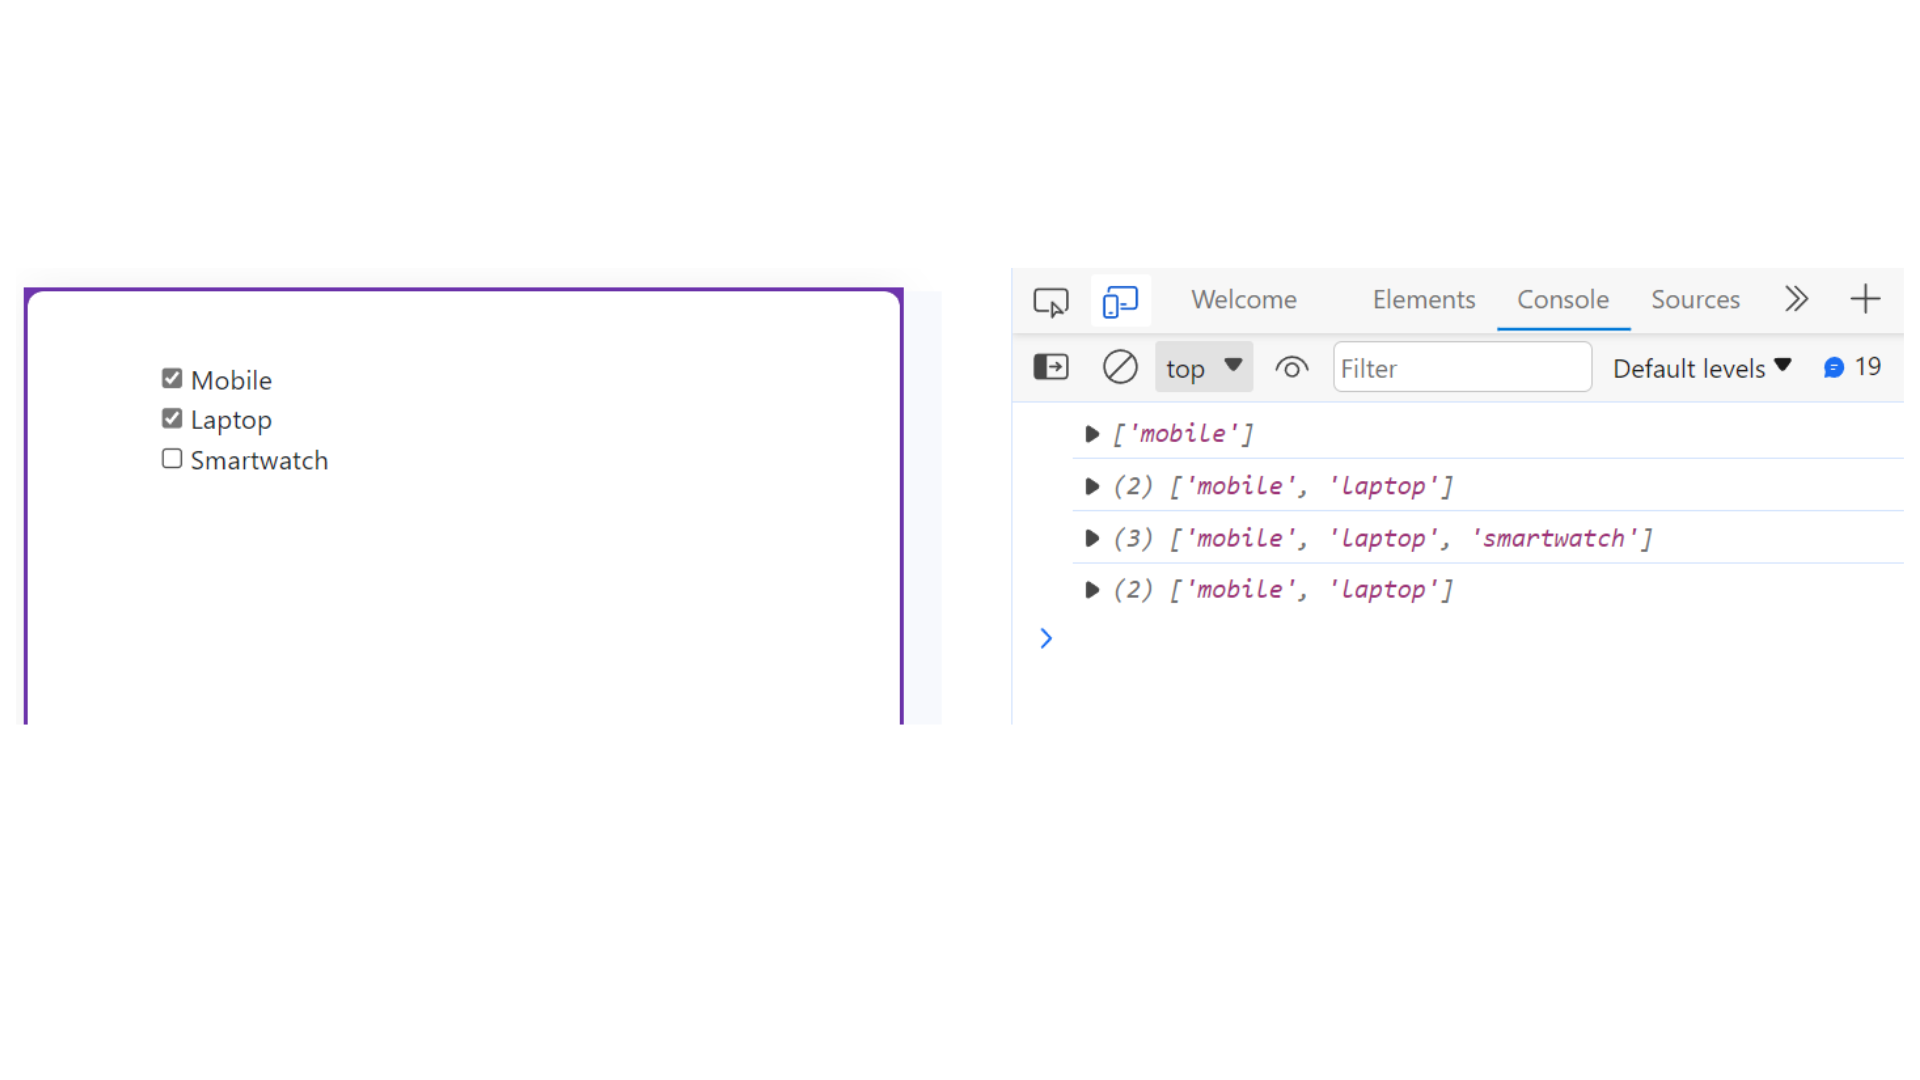
const [devices, setDevices] = useState([]);

useEffect(()=>{
   console.log(devices);
},[devices]);

const handleCheck = (e)=>{
    if(e.target.checked){
        setDevices([...devices, e.target.value]);
    }
    else{
        const indexToBeDeleted = devices.indexOf(e.target.value);
        devices.splice(indexToBeDeleted, 1);
        setDevices([...devices]);
    }
}

  return (
    <>
    <div>
    <form>
    <input
    type="checkbox"
    value="mobile"
    onChange={handleCheck}
     /> Mobile <br/>

    <input
    type="checkbox"
    value="laptop"
    onChange={handleCheck}
     /> Laptop <br/>

    <input
    type="checkbox"
    value="smartwatch"
    onChange={handleCheck}
    /> Smartwatch <br/>

    </form>
    </div>
    </>
  );
}

export default Home;
output:

dropdown menu
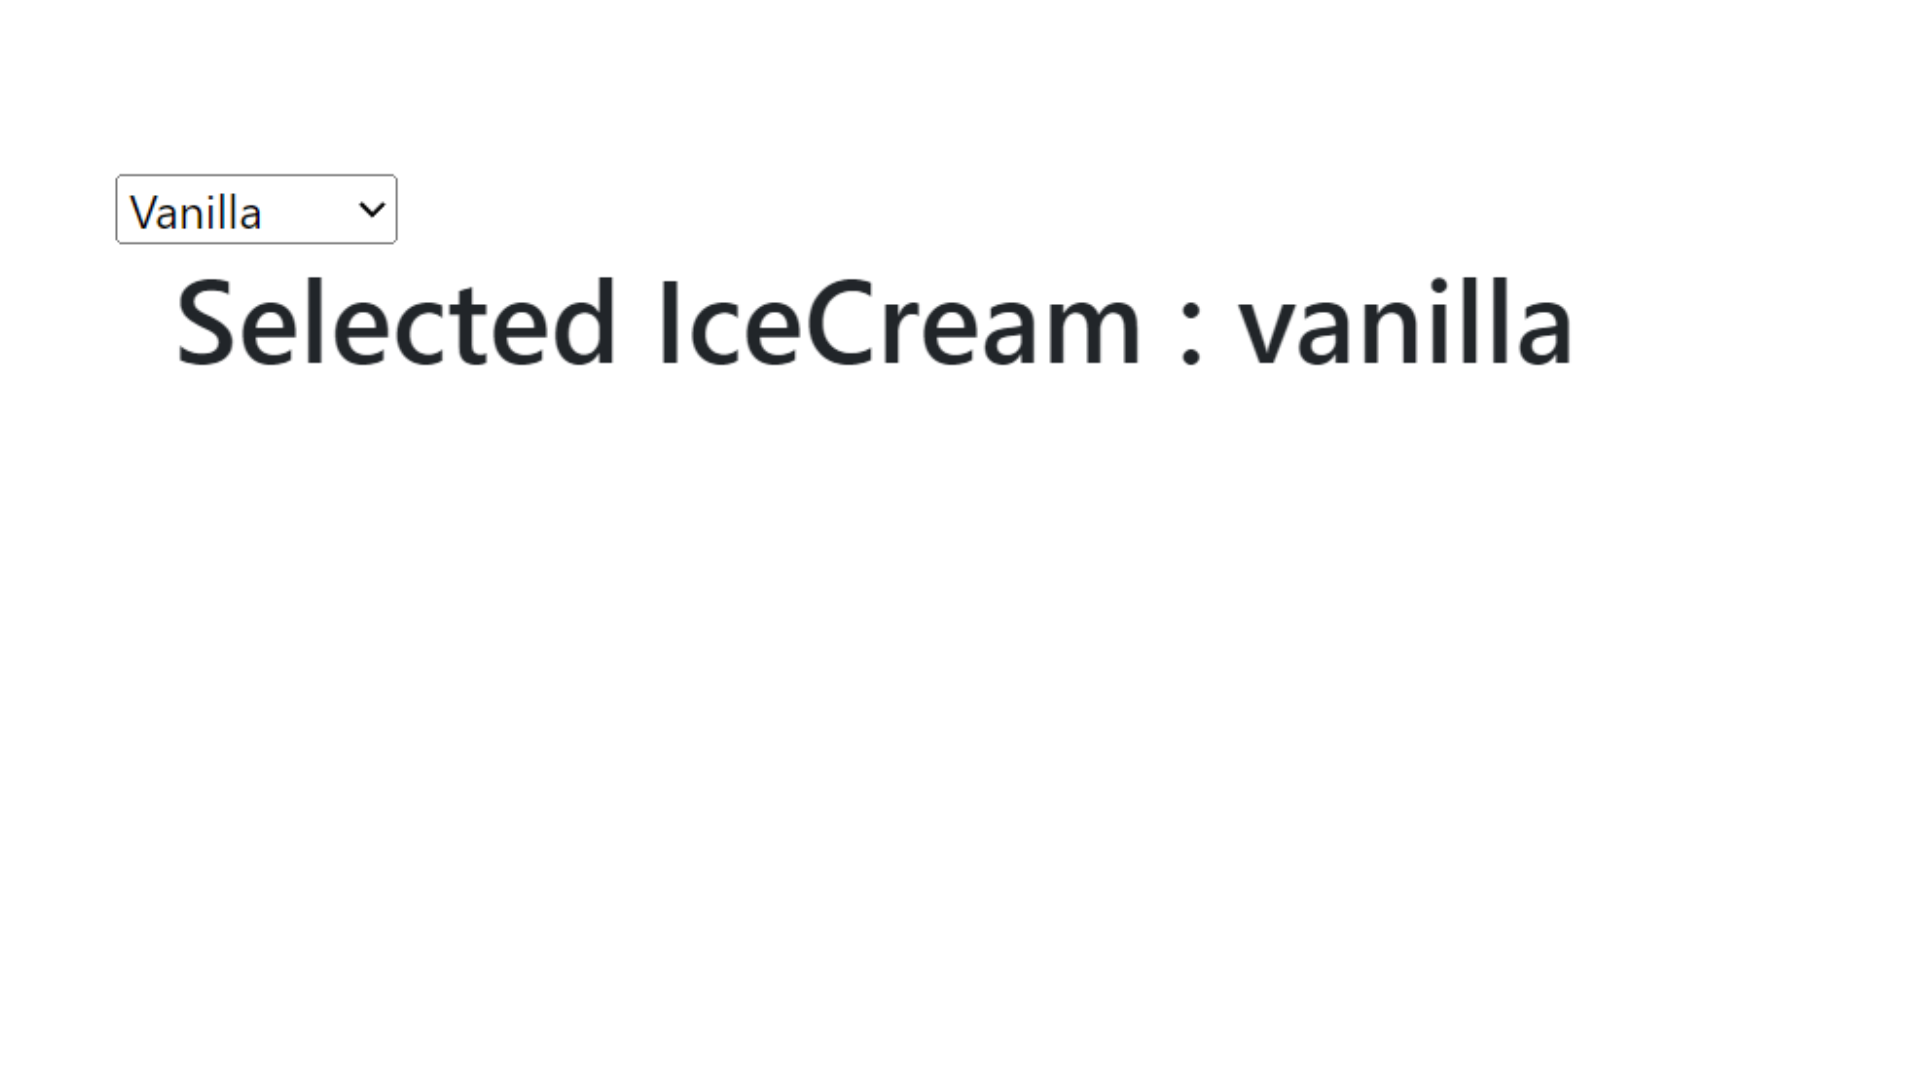
To work with dropdown menus in React, you can use the value prop and the onChange event handler. Initially, set the dropdown's value in the component's state, and when the user selects an option, update the state to reflect the new value.
Example 1:
import React,  { useState } from 'react'

function Home() {

    const [iceCream, setIceCream] = useState('chocolate');
  return (
    <div>
      <form>
        <select value={iceCream}
        onChange={(e)=>{
          setIceCream(e.target.value)
        }}>
            <option value="chocolate">Chocolate</option>
            <option value="strawberry">Strawberry</option>
            <option value="vanilla">Vanilla</option>
        </select>
        <h1>Selected IceCream : {iceCream}</h1>
      </form>
    </div>
  )
}

export default Home;
output:
